How to build your own Sierpinski's Triangle with Cans
Mathematics has
always been a subject infamous for being difficult and with less than zero applications
to life. That’s why I decided to build with IES Navarro Villoslada’s 3ºESO Bilingual
Programme students a figure which would help us to understand one of this year’s
most difficult units: progressions.

The challenge was simple: we needed to gather more thatn 1000 soda or beer cans to build the famous Sierpinski’s Triangle and try to relate it with 3º ESO’s mathematical content.
1) FRACTALS AND TRIANGLES
In the 70’s, some objects called fractals were for the first time subjected to study. These objects can be easily identified since they repeat themselves no matter the scale used. They happened to be quite useful to explain natural phenomena and to study geometric characteristics of objects whose patterns were chaotic (for example, fractals can be used to measure the length of Britain
Sierpinski’s Fractal
It is quite
common in the math world that different concepts show up in different times and
places to make perfectly sense together years after. In our particular case,
polish mathematician Waclaw Sierpinski introduced his famous triangle half a
century prior to the concept of fractals. The way of getting this triangle is
quite straightforward:
1) Start with an equilateral triangle
2) Join the middle points of its three sides and remove the central triangle
3) Repeat this process once again with the three triangles obtained before. Don't forget to remove the central triangles.
4) Continue the process.

This mathematical object has two amazing properties: it repast itself no matter the scale used and the infinite iteration of the process described above leads to a figure whose surface is zero and whose perimeter is infinite.
Different examples of Fractals
Sierpinski’s Triangle is just one example in a million. For being so historically important or for being just curious, these are some famous fractals:
 |
 |
 |
 |
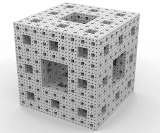
Menger
Sponge
|
Koch
Snowflake
|
Mandelbrot’s Set
|
Romanesco
(fractal vegetable) |
Throughout this process, we have need the stuff listed below:
- 1092 soda or beer 66mm-diameter cans
- 12 tubes of glue
- 2 wooden moulds
- 6 paint tins of different colours
- 24 meters of aluminium profile
- Endless hours of labour and patience
The necessity of
using a whole classroom for working and gluing brought about the fact that this
project had to be done in the afternoons.

Stage 1: Collecting the Cans
Once we were both
motivated and with enough will to succeed, an empty cube was place at the high
school’s main door so everybody would have the chance to colaborate and bring
empty cans. Here is the result of this stage:

More
than 1300 cans were collected.
Stage 2: The First Triangles
And we started
gluing cans.
Our first goal
(and the toughest one) was to glue 121 9-can triangles. For this task, we used
9 tubes of glue, 2 wooden moulds and 2 glue-pistols. Each one of these
triangles was built joining 3 blocs of 3 cans each.

Stage 3: The Next Levels
It took ages but after a few weeks we had our 121 9-can triangles
prepared. So, the time came to glue them together to get all the triangles
needed for our final figure. This time we used 2 tubes of glue. The final
outcome of this stage is depicted below:
- 1 triangle of 3 cans
- 1 triangle of 9 cans (built joining 3 3-can triangles together)
- 1 of 27 cans (built joining 3 9-can triangles)
- 1 of 81 cans (built joining 3 27-can triangles)
- 1 of 243 cans (built joining 81-can triangles)
- 1 of 729 cans (built joinint 3 243-can triangles)
- 1 triangle of 3 cans
- 1 triangle of 9 cans (built joining 3 3-can triangles together)
- 1 of 27 cans (built joining 3 9-can triangles)
- 1 of 81 cans (built joining 3 27-can triangles)
- 1 of 243 cans (built joining 81-can triangles)
- 1 of 729 cans (built joinint 3 243-can triangles)

These are the 6 triangles required for the final
figure

Stage 4: The Colour
To both visualize
and enhance the concept of fractal in our Sierpinski’s Triangle, we used 6 different colours to paint the bottoms
of the cans. This way, it is not difficult to notice that any triangle includes
those of the previous levels.
This process required
· One tin of pre-paint.
· Five tins of paint: purple, luminescent blue, real yellow, china red and TK-314 green.
· One spray of fluorescent red.

Stage 4: Getting closer to
the end
Once everything
was almost ready, we decide to place our sequence of triangles in the front
wall of the high school using aluminium profiles glued to the bases of several
triangles. This way, the final structure could be drilled to the wall. The
problem of the corner was solved dividing the fourth triangle into two halves,
as can be seen in the simulation picture:

Stage 5: Drilling
It took us two
days and a couple of ladders and one scaffolding, but after those long 4 months
our project was finally placed where it belonged.


3)
THE MATHS BEHIND
THE TRIANGLE
Sierpinski’s Maths
This figure helps
not only to understand the concept of fractal, but to visualize several concepts
related to sequences:
· The number of cans used for every triangle can be
obtained using the geometric progression:

Thus, the first
triangle has 3 cans, the second one 9, the third 27…
· The length of the base and the height of every
triangle can be calculated using the geometric progression and the sequence :


where d = 66mm is
the diameter of one can.
Furthermore, to
get these expressions we had to deal with radicals¸ Pythagoras Theorem and the expression to get the height of one
triangle in function of its side.
Important information
Prior to the
first stage of our project, we needed to know how many cans we had to collect. The
formula which gives the sum of several consecutive terms of a geometric
progression was very helpful and allowed us to conclude that 1092 cans were
needed, since the addition of the first 6 terms of the progression is:

Therefore, we
knew beforehand the dimensions of the wall needed to place our Sequence
of Sierpinski Triangles!

To my students, who have given me the motivation to
get involved in "freak" projects like this ;D
No comments:
Post a Comment